First of all, you must ensure that each side has its own key as well as the public key or the certificate of the other. It is recommended to create a separate key for VPNs on each system.
If you set up multiple VPNs on the Intra2net system, you do not have to create a separate key for each connection: you can use a separate key for all VPNs. Of course, only the public key is required from each of the peers.
It is therefore best to create a certificate for VPNs as described in Section 46.2.1, „Create certificate“.
Further details on key management can be found in 44. Chapter, „Key Management“.
A connection configured on the Intra2net system applies to the connection between a client and a network behind the Intra2net system. If you want to access multiple networks behind the Intra2net system from the one client, multiple connections can be easily configured. Make sure that you always use the same combination of keys and certificates for each of these connections. The best way to do this is to use the "" button and then edit the copied conenction.
You can configure VPN connections in the Services > VPN > Connections menu.
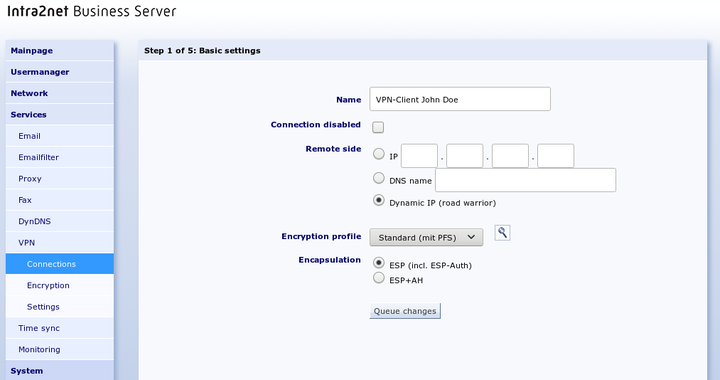
To manually configure a new connection, select "".
Set the options for the peer. The peer is not usually known on individual clients. Therefore, set it to "Dynamic IP (Road Warrior)".
The encryption algorithms used can be selected using the encryption profile; for details see Section 43.8, „Algorithms“.
Encapsulation controls how the packets for the VPN tunnel are packed. With ESP, encryption and authentication are encapsulated. ESP+AH uses separate encryption and authentication. ESP+AH cannot be routed through NAT, so it is strongly recommended to use ESP for individual clients. This setting must be identical on both sides of the connection.
Also note the setting for "". Check whether your client supports IKEv2, and then select the preferred IKEv2 option. Otherwise, use IKEv1. This setting must be configured identically on both sides, and the selected encryption profile must match the IKE version.
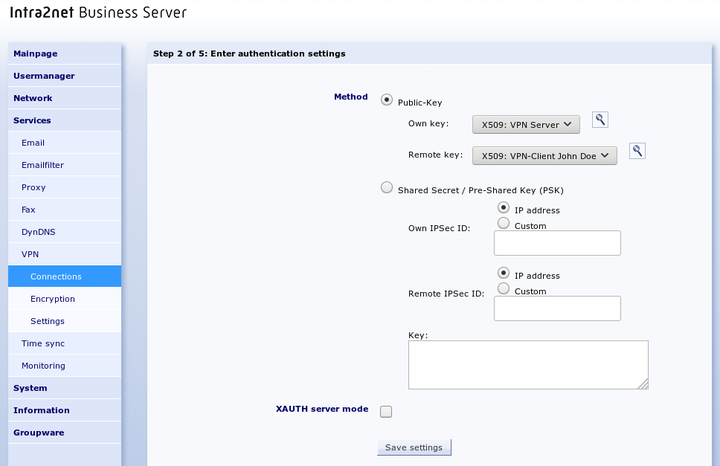
Select your own key and the key of the remote side.
Some client programs cannot request the Intra2net system key on their own. In this case, the option ""
The use of a pre-shared key for VPN clients is not recommended.
Some client programs support IKEv1 in a way that allows them to verify a user's login and password in addition to authentication via a pre-shared key (PSK) or certificates. This option is not supported in IKEv2.
In IKEv1, this is done using the Extended Authentication (XAUTH) protocol. If you want clients to use this, enable the "" option.
The XAUTH server mode now prompts the client from this connection to log on with the credentials of a user who has the group right "" on the Intra2net system. You can assign this group privilege on the "" page.
On the "Tunnel" page, you can configure which network is connected to which virtual client IP via this VPN connection.
The "" option selects the network to be connected on the Intra2net system side. With the option "" select one of the networks directly connected or routed to the Intra2net system.
If you want all client traffic to run through the Intra2net system and thus also benefit from the firewall and proxy server, select the "" option for "".
For "", select "". Select a previously unused IP that is not located on one of the networks of the Intra2net system or client. This is the virtual IP that you must also enter into the client. Always use 255.255.255.255 as the netmask.
Most VPN clients can automatically assign their virtual IP address and associated DNS servers using the Mode Config protocol extension. If your client supports this (e.g., NCP, iOS, or Android; see the description of each client), set the "" option to "" and enter the IP address you want the client to receive. The Intra2net system automatically transmits its own IP address as the DNS server.
In IKEv1, there are two different variants of Mode Config: "Pull Mode" and "Push Mode". The use of "Pull Mode" is strongly recommended, as it is more resilient to interference.
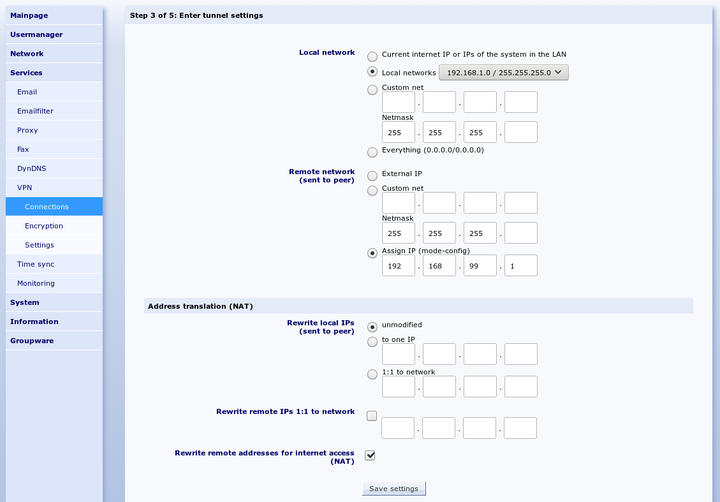
If "" has been set to a network containing addresses that are not located in local or other VPN networks, the client can access the Internet via the VPN. This applies in particular to the setting "". Since the virtual IP usually originates from a private address range, it can be rewritten to the external address of the Intra2net system (NAT) via the "" option. This NAT is only active when accessing the Internet, accesses to the local network continue to be made with the virtual IP.
Further options for address conversion (NAT) are explained in 53. Chapter, „Solving IP Address Conflicts in VPNs Through NAT“.
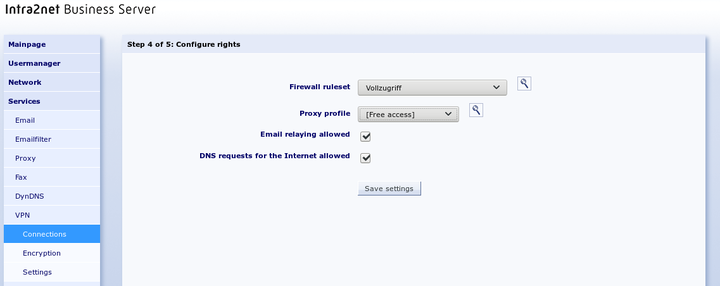
This menu defines the rights of the VPN client. This applies to all packets coming from the VPN client. A description of the rights options can be found under Section 8.3, „Access Rights of a Network Object“.
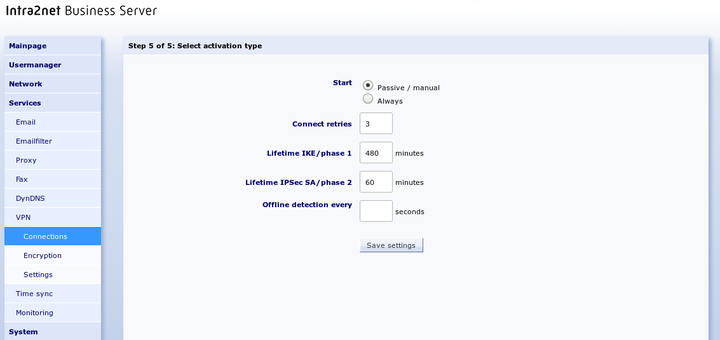
This menu is used to configure when the connection is established and when existing sessions are to be extended. With VPN clients, the Intra2net system cannot initiate the connection itself. Therefore, set the start to "" and use the default values for the remaining options.
With IKEv2, the MOBIKE feature can be enabled. This allows the VPN client to change its IP address during an active session, for example, when switching connection media. See also Section 43.7.3.5, „MOBIKE“.
With IKEv2, you can choose whether the IKE_SA should be reauthenticated or simply rekeyed shortly before it expires. For security reasons, it is recommended that VPN clients require reauthentication. See also Section 43.7.3.3, „Re-authentication vs. Rekeying“.