The Intra2net system requires its own private key with a X.509 certificate to accept VPN connections from clients. This single key can easily be used for all VPN connections. Technically it would be possible to use this key also for SSL/TLS connections. However, certificates used for this purpose typically have a short validity period, which is why a dedicated key is usually the better choice for VPN connections.
Some VPN clients require a CA signed certificate, so we recommend setting up a CA signed certificate as described below from the very beginning.
The Intra2net system should be addressable for the VPN clients via a DNS name on the Internet.
If the Intra2net system has a static IP, set up a DNS entry for it in your own official domain. The system can then be reached under a name such as
intra.company.comormail.example.com. This can normally be set up free of charge and promptly by the web space provider that hosts the domain.If the Intra2net system is assigned a different IP for each Internet dial-up, a DynDNS service must be set up for addressing. See Section 10.13, „DynDNS“.
A static IP cannot be used directly with some VPN clients without a DNS name. In addition, changing the IP when changing providers is costly. We therefore recommend to use only DNS names and no IPs for addressing.
Go to the menu "" and enter this externally accessible DNS name in the field "".
Go to the menu "" and create a new, self-signed certificate.
Name the key
VPN-CAor similar and also enter this as computer name. Enter NOT the DNS hostname of the Intra2net system as host name. We recommend a validity period of 5 years. Let the key be generated.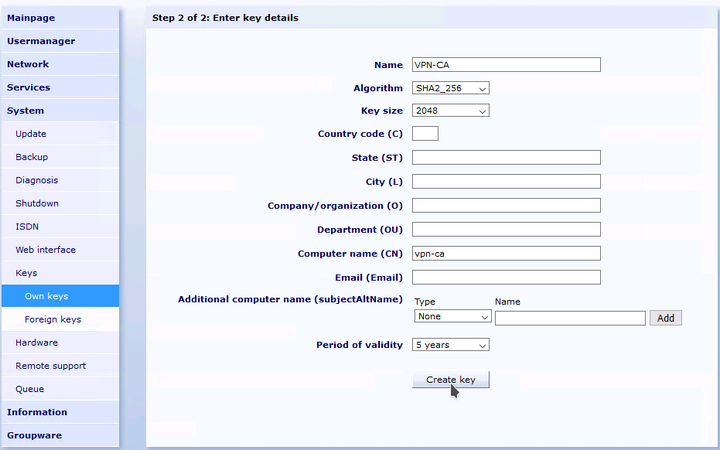
Create another new self-signed certificate. Give the key the name "VPN" and then append the external DNS host name of your Intra2net system, e.g.
VPN myintra.dyndns.org. Enter the external DNS host name under "". To prevent ID conflicts with certificates used for TLS, enter for exampleVPNunder "". Create the key.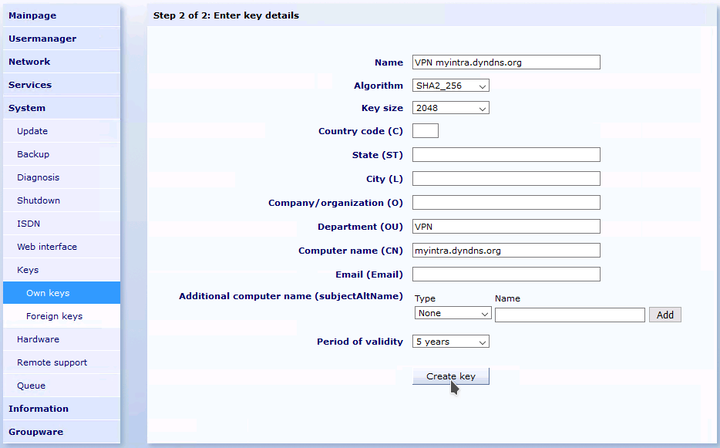
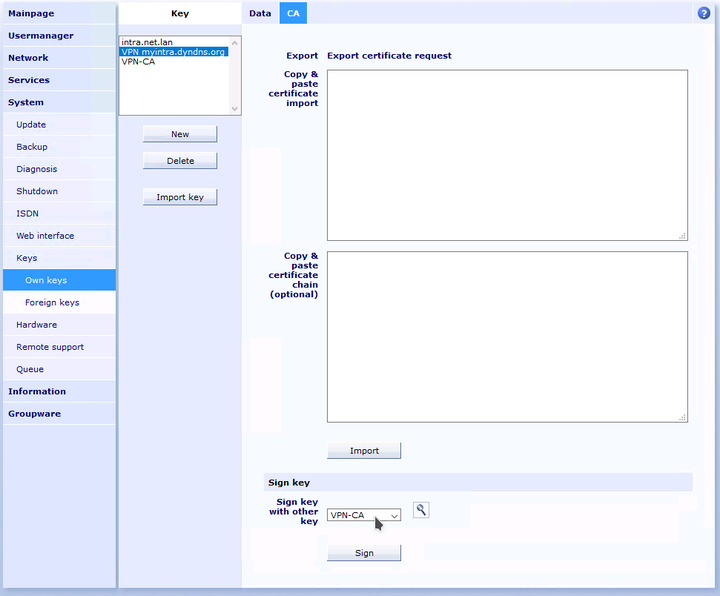
Change to the tab "" for the just created key. Sign this key with the previously generated VPN-CA key.
Set the IKE ID to be used with this key to the ID_FQDN type. In other words, use only the stored computer name, without the “CN=” prefix, as is specified for the ID_DER_ASN1_DN type.
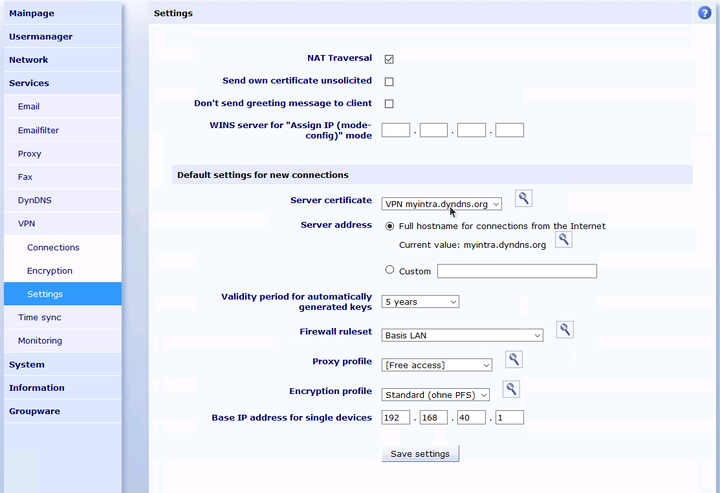
Go to the menu "" and configure the just created and signed server certificate as default.
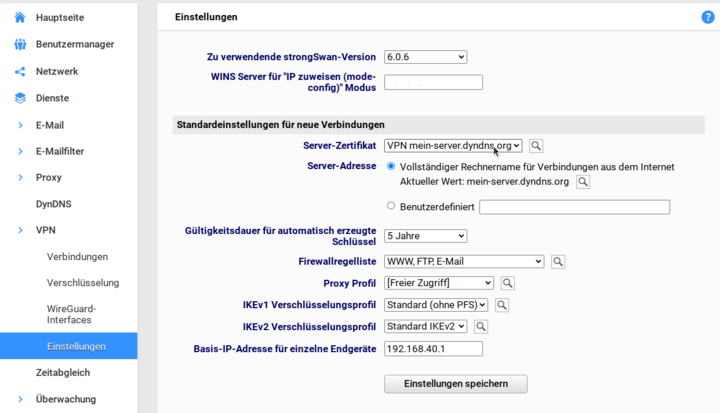
In the menu "" you can define the default settings for newly created VPN connections. The settings stored there apply to both IPSec and WireGuard connections.
Server certificate and server address must be configured as described in Section 46.2.1, „Create certificate“.
Select a firewall ruleset that allows the needed access to the local network that is desired for VPN clients.
Each VPN client is assigned an individual, virtual IP for the VPN connection. This IP must lie outside of all local networks, routings and other VPN connections. Enter the IP for the first VPN client under "". All other VPN clients will receive consecutive IPs.