Table of Contents
The NCP Secure Entry Windows Client is sold through several distributors. A 30-day trial version can be downloaded from the Homepage of NCP.
Prepare the Intra2net system for a connection with VPN clients first as described in Section 46.2, „Preparing the configuration on the Intra2net system“. After that the complete configuration for the client can be generated by the Intra2net system as described in Section 46.3, „Automatic configuration for clients on the Intra2net system“.
Transfer the generated configuration file to the client PC, e.g. via USB stick or a remote maintenance program. To simplify the installation, the ZIP file contains a batch file and a PowerShell script. Since these are blocked by many email filters, we recommend not to send the file by email.
Then proceed as follows on the client PC to import the configuration:
The configuration consists of several individual files and is transferred packed as a ZIP file. Open the ZIP file in Windows Explorer and extract all contained files into a new directory.
The unzipped files contain the batch file
install-ncp-certs.bat. Start it with a double click to install the certificates.This will copy the certificate files to subdirectories of
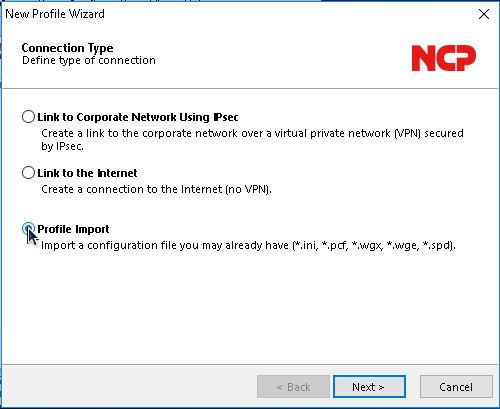
C:\ProgramData\NCP\SecureClient, the private key for the client tocerts, the public key of the Intra2net system tocacerts.Start the NCP Secure Entry Client and open the menu "".
Click "" and "".
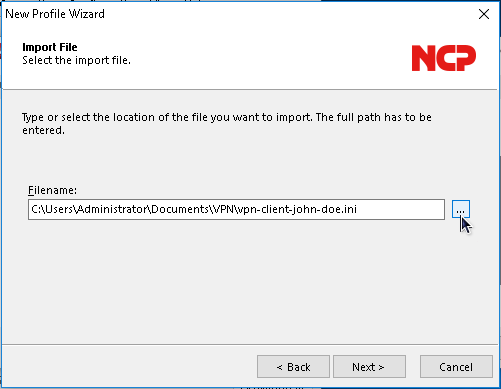
Click on "" and select the previously unzipped INI file.
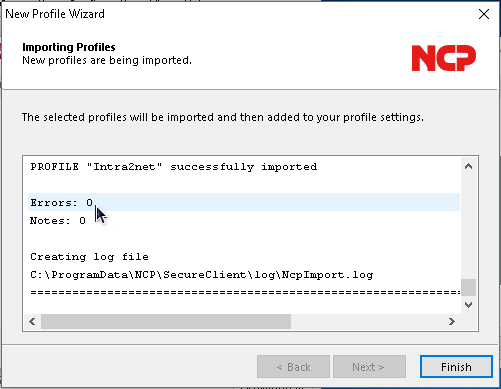
Confirm the import. The profile should now be imported without errors.
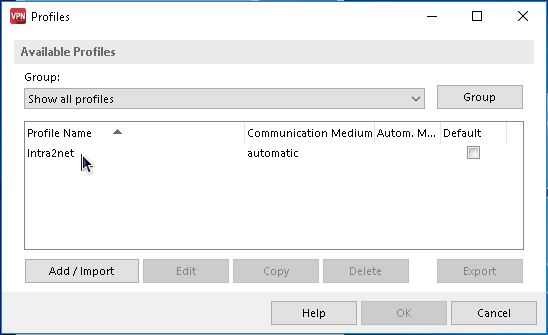
The new profile is now displayed in the profile overview and can be used.