Before configuring the device, the Intra2net system must be prepared for connection. Perform the steps described in Section 34.2, „Server Settings“.
The configuration procedure of the device is as follows:
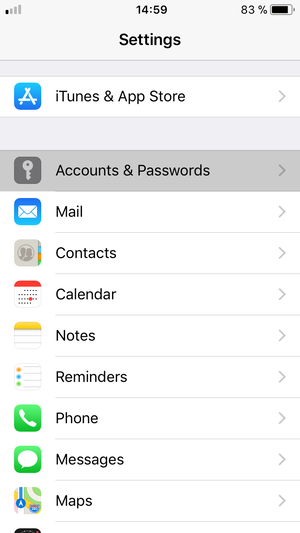
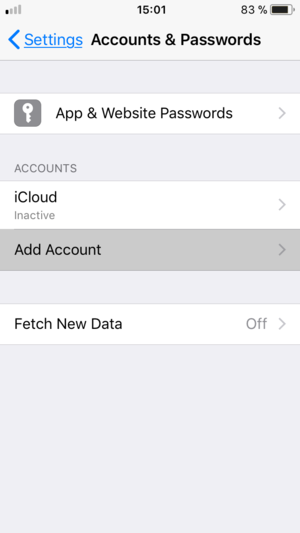
Open "", Submenu "" and select "".
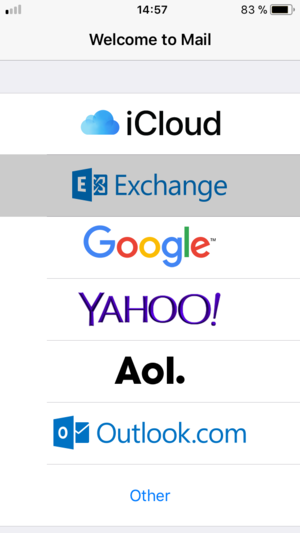
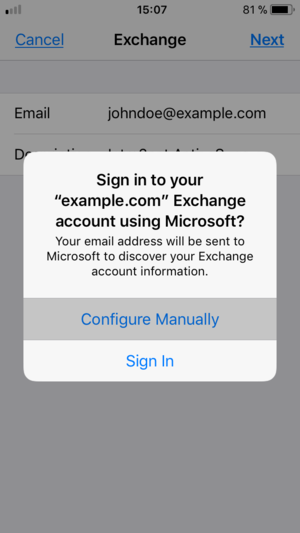
The type of account to be added is "".
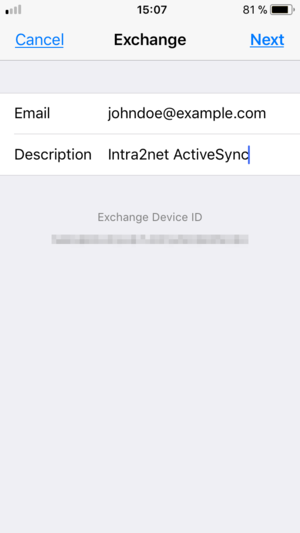
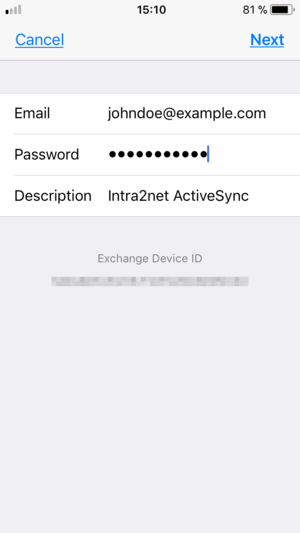
Enter the email address and a name of the account for the iOS device.
Select "".
Enter the user account password for the Intra2net system.
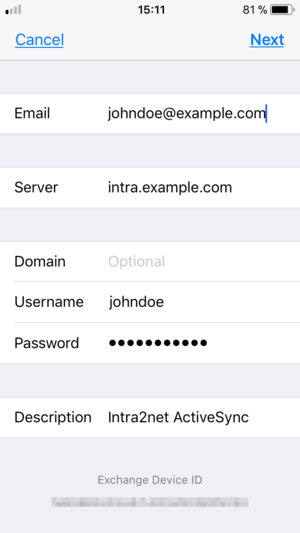
Enter the external DNS name of the Intra2net system in the "" field. Enter the user name (login) of the account on the Intra2net system. Leave the field "" empty.
No security warning or certificate error message should appear. If one appears, stop here and check the steps described in Section 34.2, „Server Settings“.
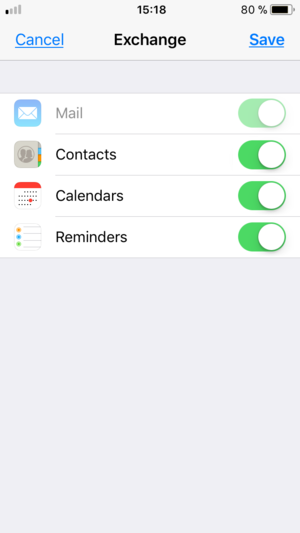
Select which types of data you want to synchronize.
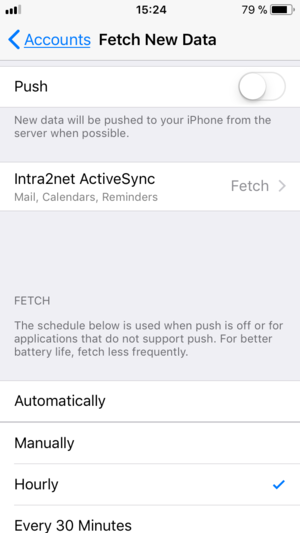
Finally, open the "" menu and set how often the data should be synchronized.
![[Tip]](../images/admon/tip.png)
Tip We recommend setting the synchronize frequency to 15 minutes or longer and advise against using "". In push mode, a wireless connection is constantly active and the device cannot make use of energy saving modes. This significantly reduces the battery life.
The new account is now available for selection in email, contacts and appointments/tasks in the appropriate applications. For new items to be added, choose between different accounts set up on the device.
It is also normally possible to manually trigger data synchronization. This option is usually preferable to using a very short synchronization interval.