The Hyper-V virtualization system is part of Microsoft's Windows Server 2012 R2 and can be activated as a part of it.
Additionally, the always-free Microsoft Hyper-V Server 2012 R2 is also available. However, this can only be operated via command line and Powershell, which makes configuration and maintenance much more difficult. Therefore, we can only recommend it to experienced Windows administrators with extensive knowledge of command line operation and we do not offer support for it. For this reason, we recommend using Windows Server 2012 R2 for Hyper-V virtualization.
The Intra2net system contains all of the drivers and software necessary for reliable operation of Microsoft Hyper-V on Windows Server 2012 R2. Additional installation of integration services or other drivers or software is not necessary or possible.
![[Caution]](../images/admon/caution.png) | Caution |
|---|---|
Hyper-V does not offer the ability to pass through PCI devices such as network cards directly to a VM. We therefore recommend using a Hyper-V virtualized Intra2net system in combination with an additional hardware firewall. Further information can be found in Section 3.1.3, „Contact with Unfiltered Network Packets“. |
To install a virtual machine, follow these steps:
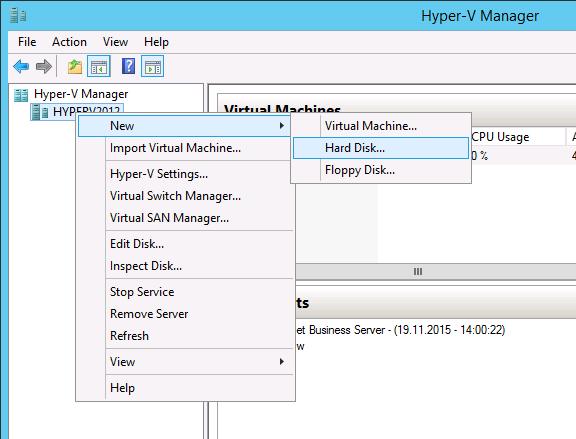
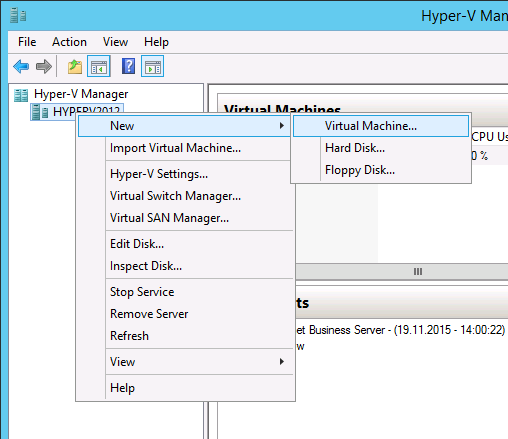
Open the Hyper-V Manager and right-click the desired Hyper-V instance. Select "".
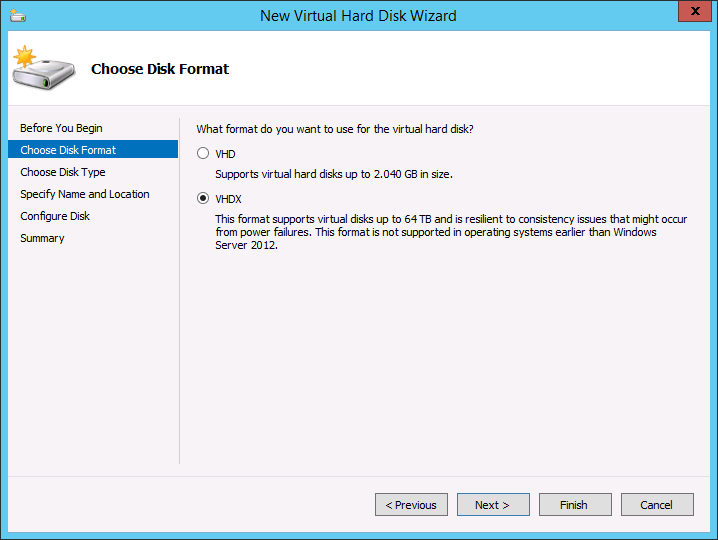
Select the "" format.
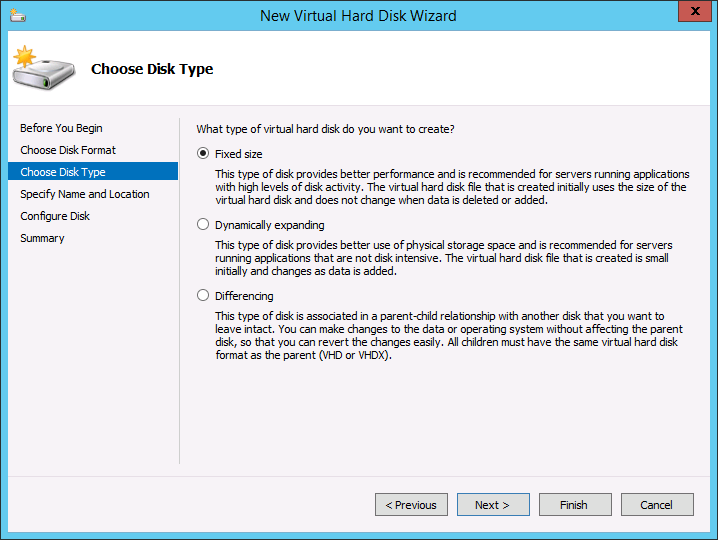
Select a virtual hard disk with "".
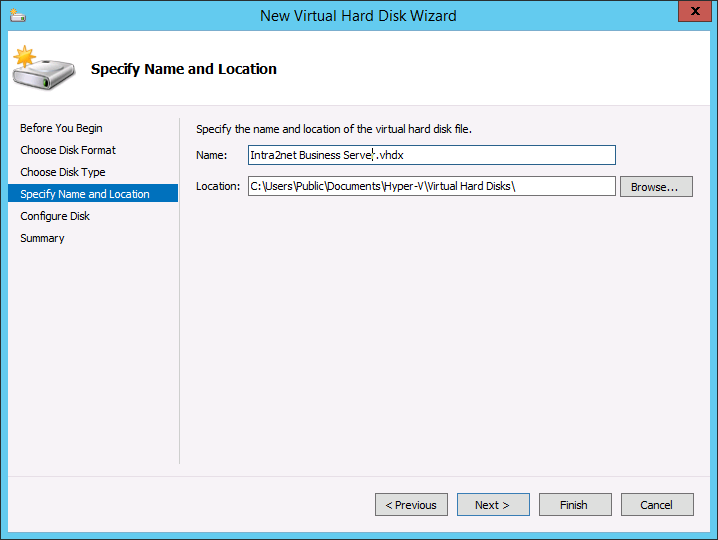
Give the virtual hard disk a name that corresponds to the future VM.
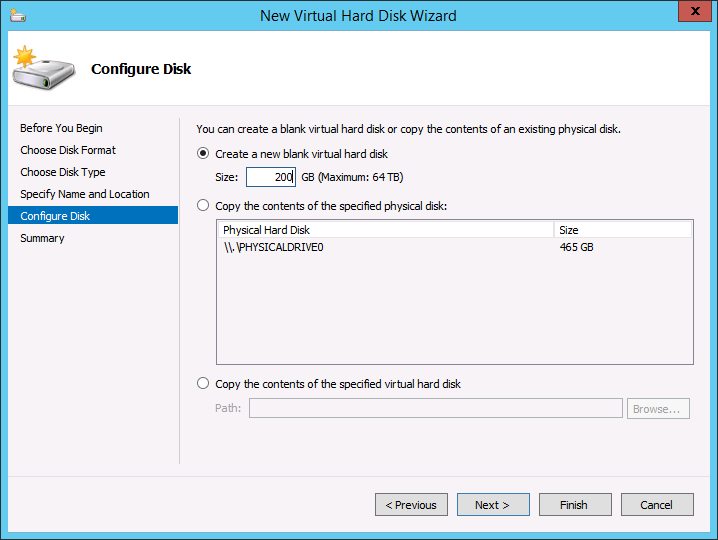
Assign a hard drive of at least 40 GB to the Intra2net system. If the system is only used for scanning emails and as an HTTP proxy server, these 40 GB will typically be sufficient. Only if extensive statistical data is to be stored for a long time and for many users, more space will be necessary.
If email or groupware data is permanently stored on the Intra2net system, more hard drive storage is required. The general formula is: (full email volume of all users + statistics) x (number of backup records stored on the system + 2) + 20 GB. The number of backup records stored on the system is at least 1, we recommend 2.
Always allow for some spare capacity, as enlarging the hard disk during operation can only be done by the Intra2net support.
Complete the virtual hard disk creation.
Right-click the desired Hyper-V instance and select "".
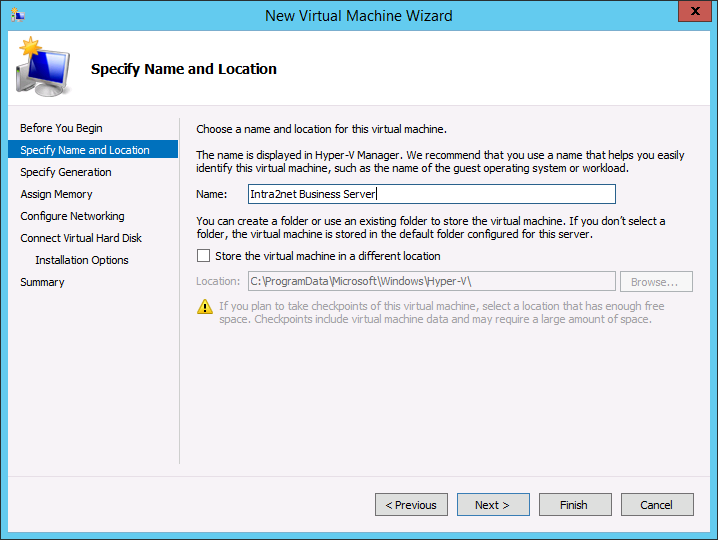
Enter the name for the VM.
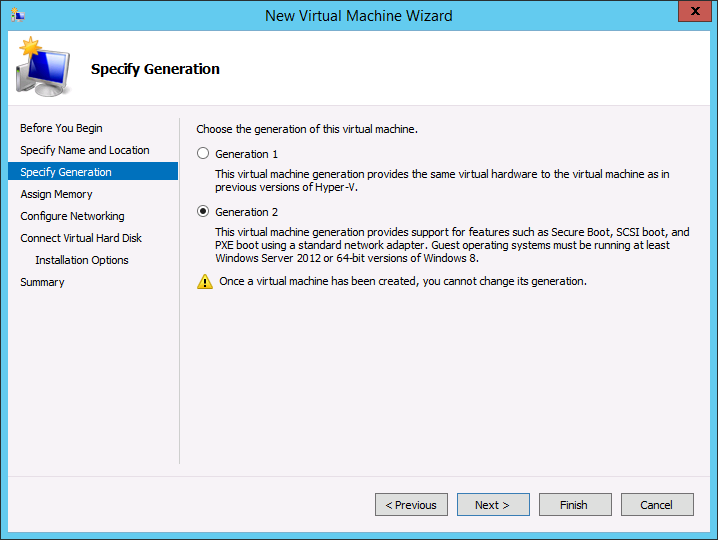
Select Generation 2
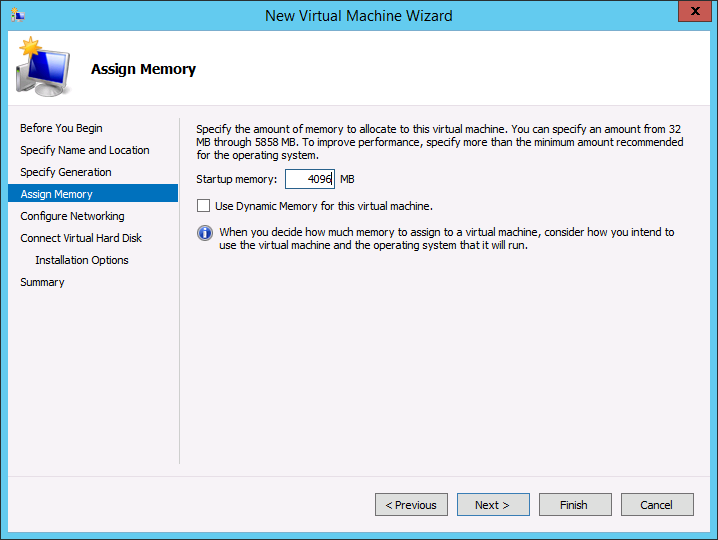
Allocate sufficient memory to the VM. Use at least 2 GB. Disable "".
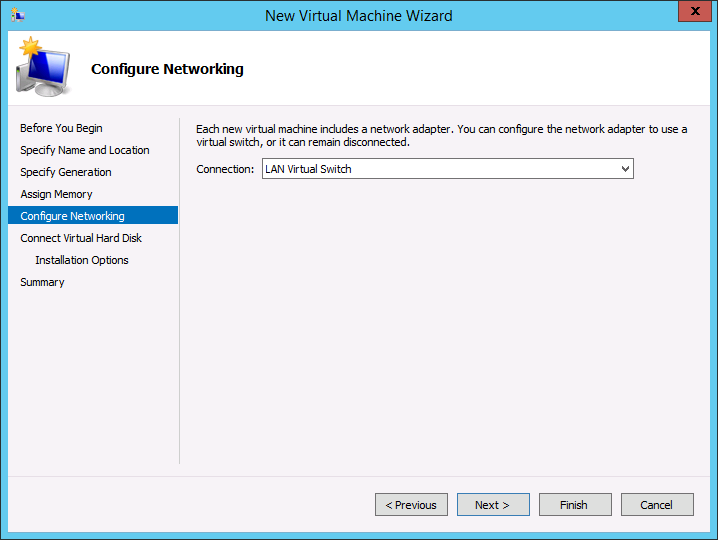
Connect the VM to the virtual Switch that is connected to the local network.
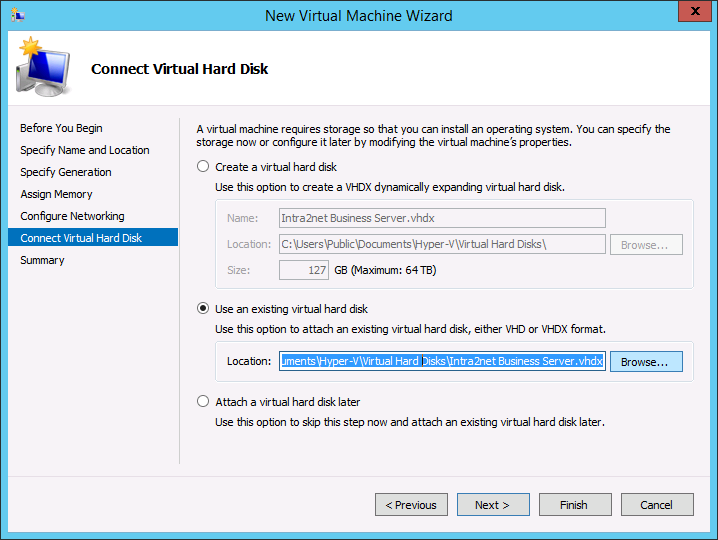
Assign the previously created virtual hard disk.
Complete the VM creation.
Right-click the new VM and open "".
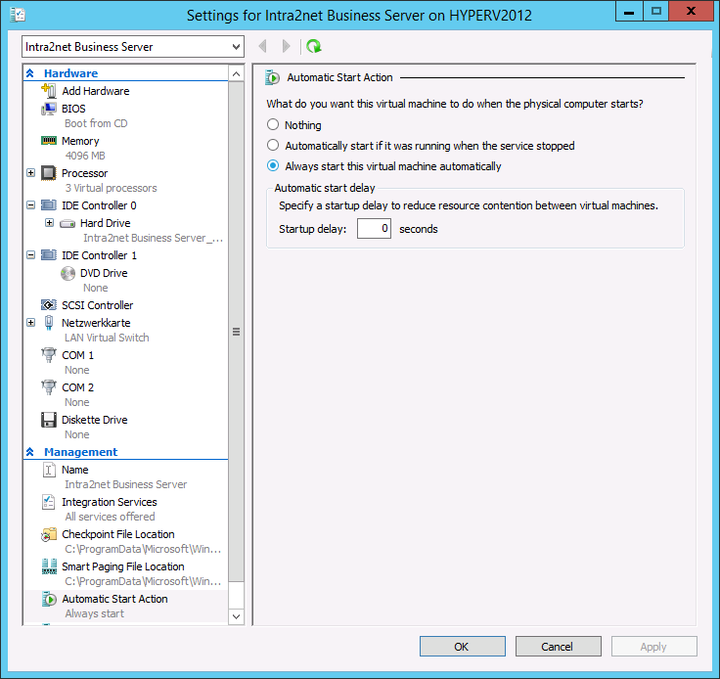
Always start the VM automatically so that the VM is always available.
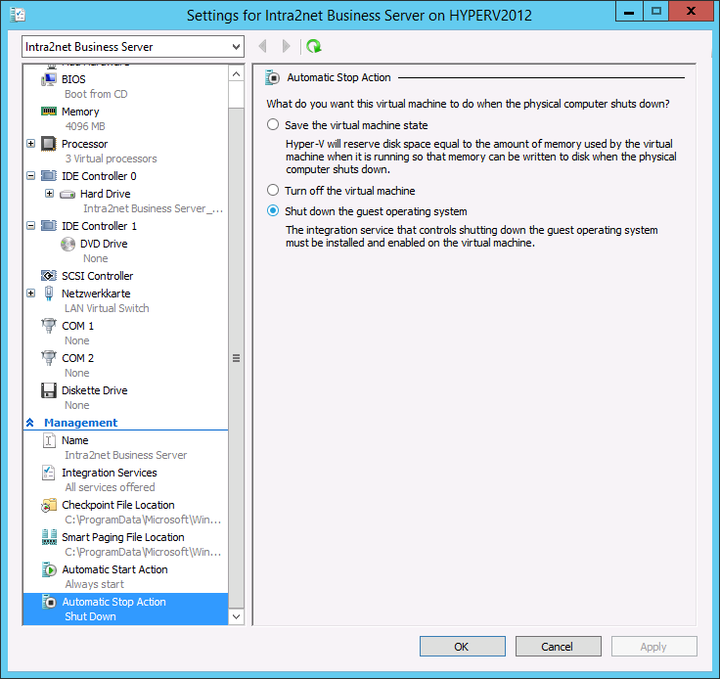
Always shut down the VM when the Hyper-V server shuts down. This avoids problems caused by time differences.
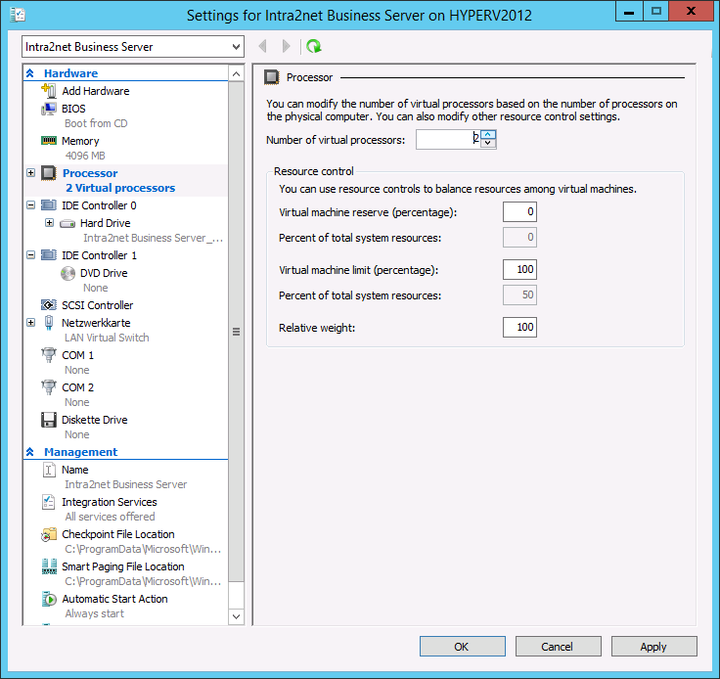
Increase the number of processor cores allocated, depending on available resources. This setting can be adjusted at a later stage if required.
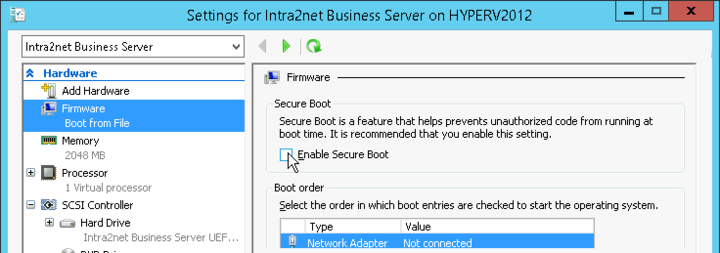
Under "", disable the option "Enable Secure Boot".