Table of Contents
To allow other users to access a folder, the owner must first share it as follows:
Open the "" menu.
On the left side (server accounts) click on the folder to be shared.
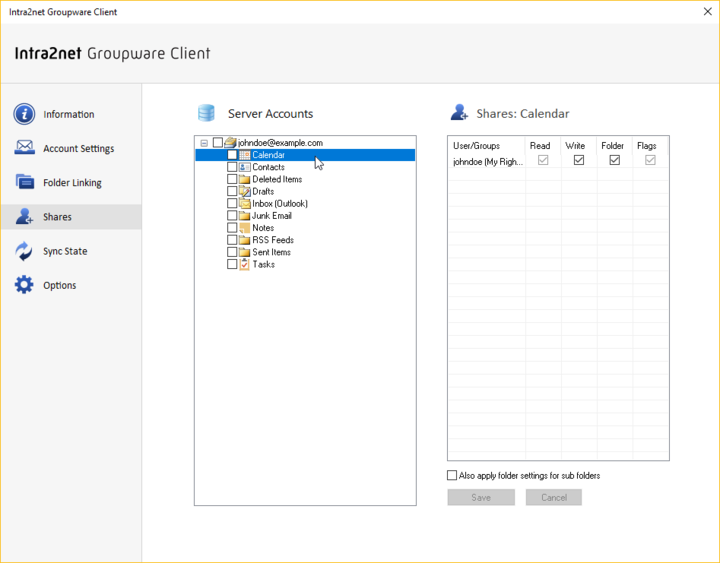
Double-click on the right side (Shares) to open the dialog for a new share. Select the user name or user group with which the folder is to be shared.
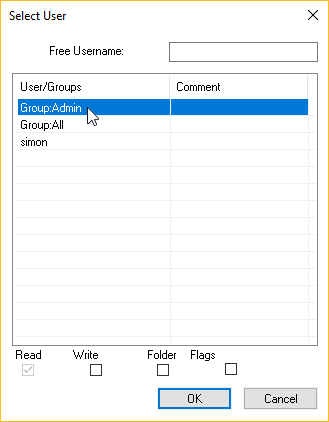
Use the checkboxes at the bottom of the dialog to select the rights that are to be granted to other users. Close the dialog with "".
Click "" to add the new rights to the server.
After that, other users can link the shared folders as described in Section 21.2, „Linking Shared Folders“.
We advise against sharing with individual users, but with user groups on the Intra2net system. This simplifies the management of shared folders, especially during user fluctuation and restructuring.
The meanings of the various rights are as follows:
|
Read |
The user can see the folder and all of its contents. |
|
Write |
The user can create new entries in this folder and change or delete existing ones. |
|
Folder |
The user can delete, rename, and create new subfolders within this folder. Additionally, the user gets administration rights to the folder and can change the sharing rights for other users. To delete folders with existing content, the user also needs the "Write" permission. |
|
Flags |
The user may change the read, reply, and flagged flags of the existing content. |
The set rights normally only apply to the selected folder itself. With the corresponding option, the rights set for the selected folder can also be applied to all subfolders. Not only the currently changed rights are adjusted, but the complete rights set for the selected folder are set for all subfolders exactly the same as for the selected folder.
Newly created folders always adopt the rights of their parent folder when they are created.