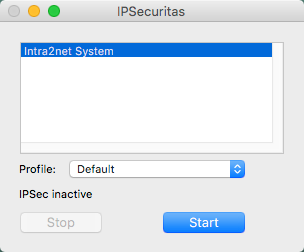
In IPSecuritas, open the "", "" menu.
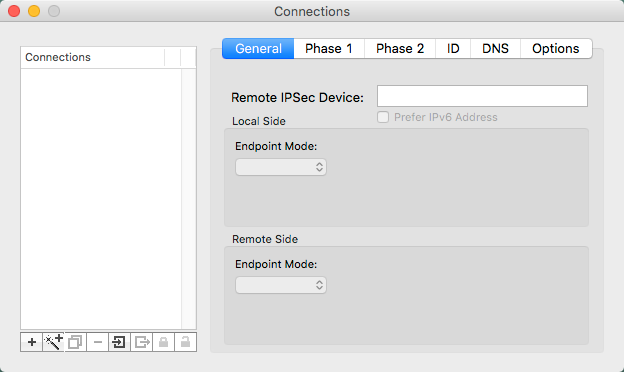
Create a new connection using the "" button and give it a name (in this example
Intra2net System).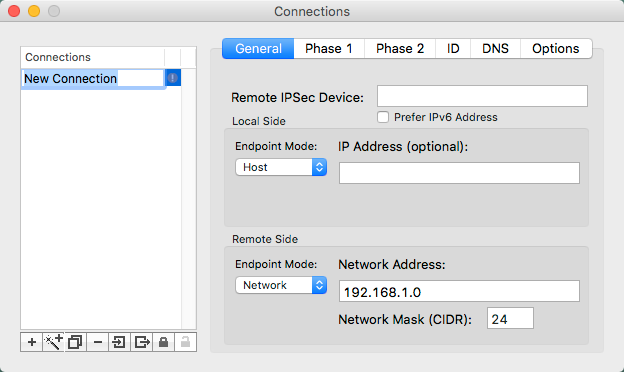
In the "" menu, under "" enter the DNS name of the remote side or if necessary the external IP address of the Intra2net system.
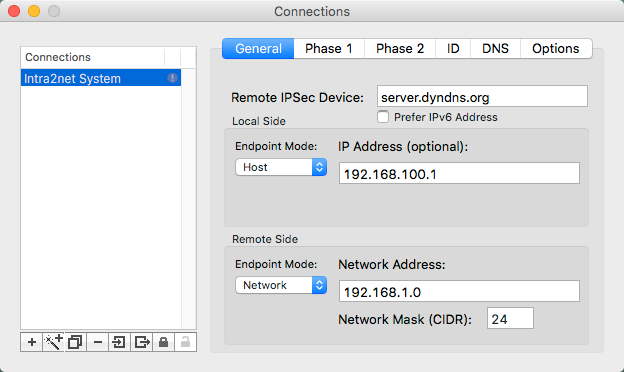
On "Local Side", set "" to "" and enter the virtual IP that the Mac client should use for the VPN. Contrary to the field description, the IP is not optional, even if you selected "" in the configuration on the Intra2net system. The IP must be the same as specified there.
With "Remote Side" set "" to "" and enter the address of the network behind the Intra2net system. The netmask is entered in CIDR notation;
24(bit) corresponds to255.255.255.0.From the "" menu, it is possible to configure the encryption parameters for phase 1. These must match the encryption profile selected on the Intra2net system.
For the default settings, set the "" to
1536 (5), "" toAES 192and "" toSHA-256.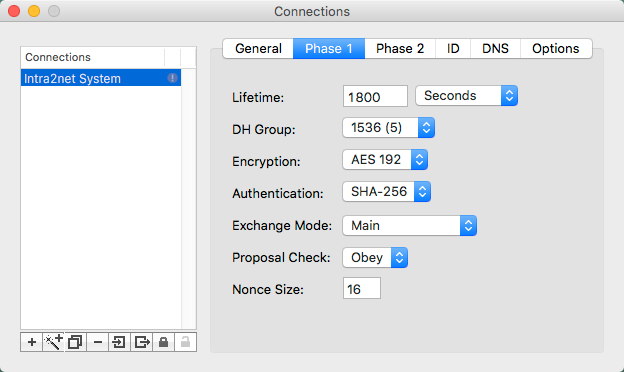
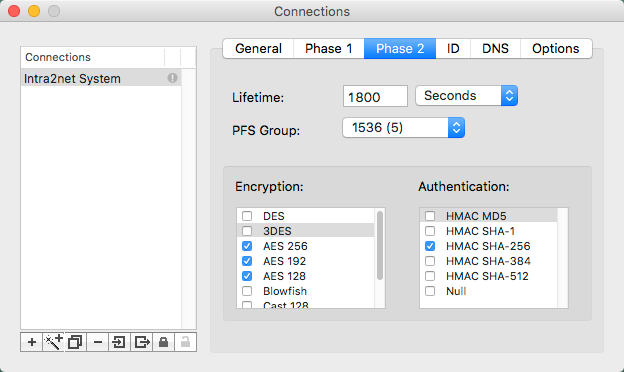
From the "" menu, it is possible to configure the encryption parameters for phase 2. These must match the encryption profile selected on the Intra2net system.
In the default settings, set the "" to "1536 (5)" and activate only the AES encryption methods under "". Under "" enable "HMAC SHA-256" only.
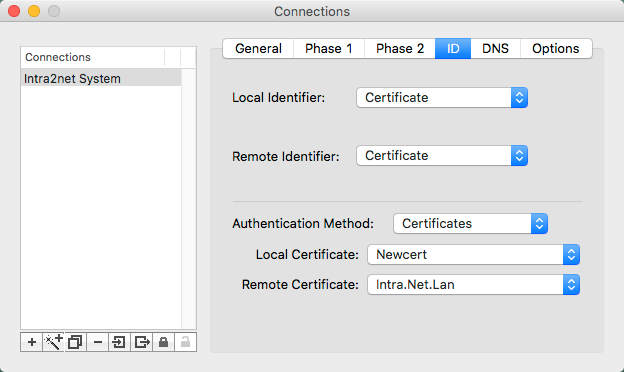
In the "" menu, under "" and "", set "" for each item. Select "" as the "" and enter the two previously imported certificates.
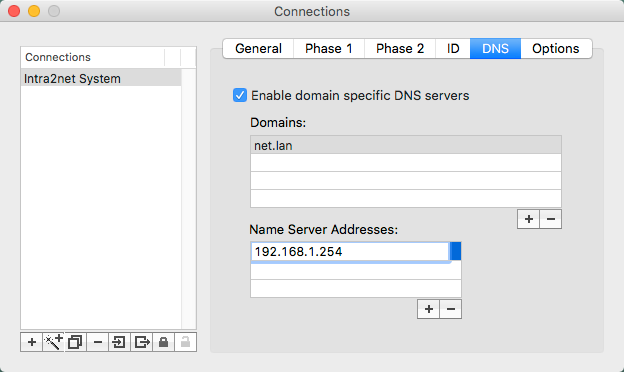
In the "" menu it is possible to have a specific domain resolved by a server in the VPN (e.g. the Intra2net system).
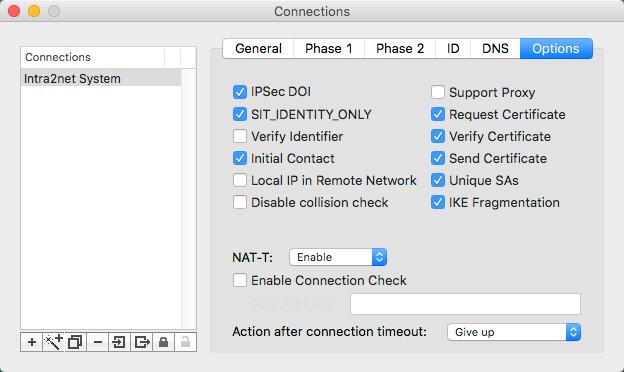
In the "" menu, set the various options as shown here.
The connection can now be established in the main window by clicking "".